Why consider alternatives to non-stick pans?
For starters, Teflon coatings present a slew of bizarre health risks. Even the “PFOA-free” pans aren’t much (rather, any) safer, which we’ll explain below.
Luckily, you’re in the right place. I set out to find the best Teflon alternatives and came back with three: stainless steel, cast Iron, and non-stick ceramic.
But I didn’t stop there. It’s one thing to explain each alternative… It’s another to show it. So, to best serve you, I decided to go with the good old egg test and put my results here.
Below, you’ll discover a few simple tips to prevent sticking with each. Plus, watch me cook an egg by following these instructions. Also, we explain what to do if the pan still sticks, the need-to-know drawbacks and buying considerations before choosing, best practices for care, and our top brand picks for each.
Let’s get started!
3 Reasons to Ditch Non-Stick Cookware
Did you know… A pan filled with two tbsp of oil over high heat hits 514℉ in only 2.5 minutes? It’s true.
Now, I’ve accidentally overheated cookware loads of times. I’m only human. But little did I understand the risk.
Research shows exposure to Teflon chemicals may have troubling impacts on our health.
And guess what? New Teflon isn’t much better.
Here’s why avoiding Teflon is so vital—
How bad is Teflon?
Some say it’s harmless. Some say it’s lethal.
Both are a bit of a stretch (unless you’re a pet bird – in that case, Teflon is lethal).
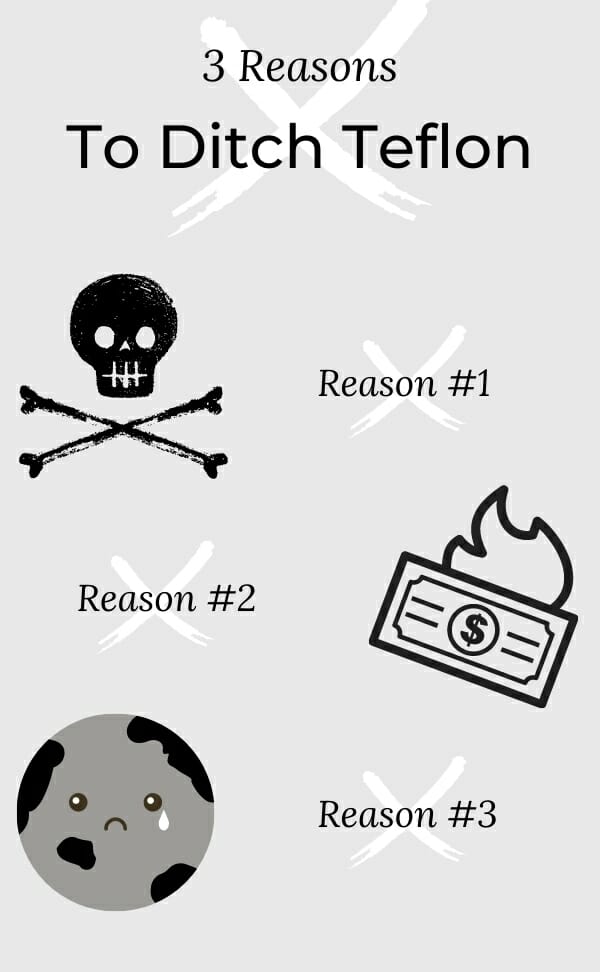
Here are three reasons to avoid traditional non-stick pans…

In most conditions, non-stick coatings remain safe… Until you overheat them.
But what’s considered overheating? At what temperature does Teflon become dangerous?
464℉, according to the EWG’s and Dupont’s studies (the company that produces Teflon).
Once at 464℉, the coating starts breaking down. Then, releasing toxic fumes from PFOA – which (was) one of the primary PFAS chemicals in Teflon.
And remember what I said earlier? You can hit 464℉ in two minutes on high heat.
What about newer non-stick pans? PFOA defined
Due to PFOA’s relationship to cancer and other ailments, the EPA banned it from Teflon in 2013.
As a result, you see PFOA-free non-stick pans advertised today.
What does PFOA-free mean? Is it any safer?
Instead of PFOA, manufacturers use the PFAS alternatives—GenX and PFBS—to make Teflon.
And here’s something rarely discussed…
PFOA-free pans are not Teflon-free pans. They simply have a small ingredient change.
Many consider these new alternatives free from the same risks. And EPA research does show GenX and PFBS to be a bit less harmful than PFOA.
But…
Research also shows both to impact the kidneys, blood, thyroid, and immune system in lab animals.
So, there’s only a marginal difference in safety between modern Teflon and pre-2013 Teflon.

PTFE pans don’t last forever.
At best, you’ll score 3-5 years from a non-stick pan before you need to buy a replacement. And that’s with babying a high-quality pan.
Cheaper non-stick pans and poor habits may only give you a year.

It’s terrible for the environment. Picture this—
You chuck your old pan in the trash because the non-stick coating wore out.
The pan then sits in a landfill. Once the PFAS chemicals leach into the ground, they linger “for an unknown amount of time,” NIEHS says.
Over time, these chemicals accumulate in drinking water, the food chain, and consequently, you.
In fact, according to national health survey data, 98% of human blood contains PFAS.
The Bottom Line on Teflon
Teflon pans are safe to cook with as long as you stay under 464℉. But here’s my problem with that—
It’s easy to tell someone not to overheat their pan. But, nobody I know takes temperature readings of their cookware. The reality is, overheating happens much faster than we think.
Sure, getting distracted is one way to burn too hot. But you can pass 500℉ during regular use… Good Housekeeping tested this and found you can reach 577℉ when cooking burgers in a pan. Steak? 656℉.
So, with that possibility of risk, it makes sense to want an alternative. You shouldn’t have to worry about overheating, period! Use the following cookware instead:
3 Best Non-Stick Alternatives (and my test to see if they actually work)
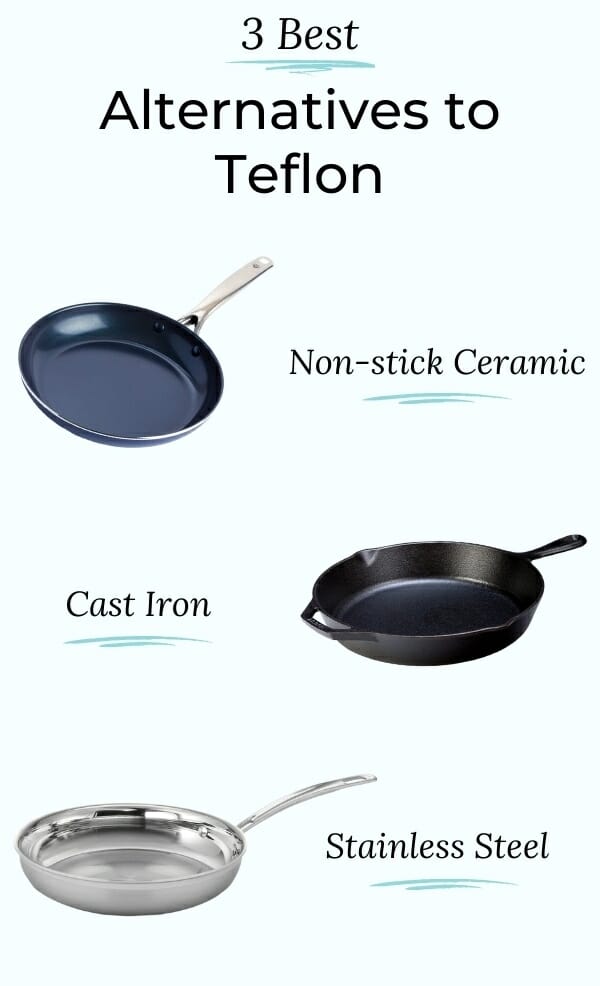
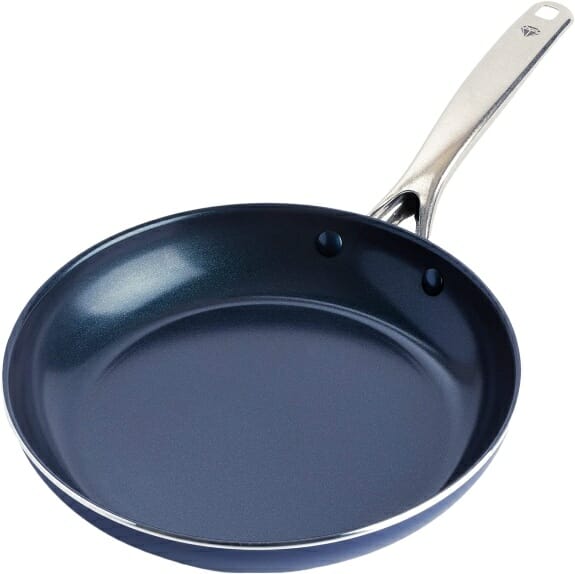
Ceramic-coated, cast iron, and stainless steel are my top three non-stick pan alternatives.
Sure, cast iron and stainless steel don’t seem like something one considers “non-stick.” However, with a bit of patience and a few simple tricks, you can easily prevent sticking.
Side note: This was literally my first attempt to cook eggs in cast iron and stainless steel.
First up, non-stick ceramic – the easiest to use.
#1 Non-Stick Ceramic
Non-stick ceramic-coated pans mirror Teflon. They have a sleek, Teflon-like surface with easy food release. Yet, they’re entirely free from PFAS and PTFE.
To be clear, we’re not talking about pure ceramic cookware. That’s entirely different and doesn’t make a good alternative to non-stick pans. It’s too sticky.
Instead, ceramic-coated pans are simply aluminum coated with a silica (sand)-based gel.
Manufacturers then bake the pans, hardening the gel into a “ceramic-like” surface.
Benefits of Ceramic-Coated Pans
Like Teflon, ceramic-coated pans resist sticking without using oil. So, you can lower your calorie intake.
It also wipes clean easily like Teflon, helping to save time.
But the main benefit – no toxic fumes if you overheat your pan! And no environmental contamination, either.
In fact, sources claim ceramic pans emit 60% less CO2 during production than Teflon.
Another plus, there’s a wide variety of shapes, sizes, colors, and construction available. We’ll discuss “construction” soon. For example, GreenPan, Our Place, and GreenLife offer unique designs and stylish colors.
The Test: How non-stick ceramic performs
Below, I’m using a 10” Blue Diamond ceramic pan without butter.
Let’s test it out.
Step 1: Preheat the pan (important!) for 2 minutes over medium-low to medium heat.
Step 2: Add your egg(s).
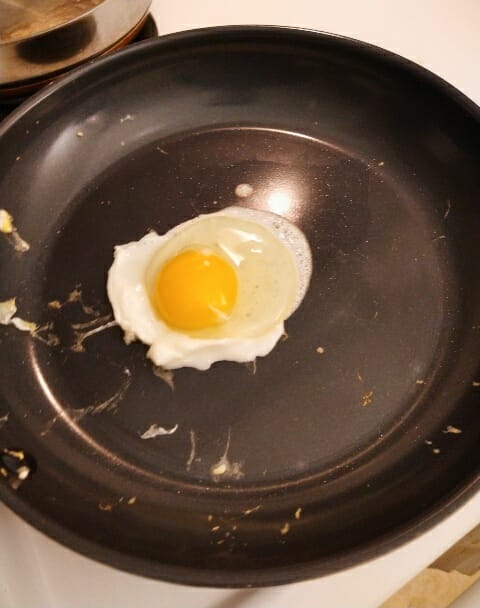
I snapped the above image right after adding the egg. Notice how the whites stay put?
That’s because the pan is hot enough.
You can test the pan’s heat by splashing water onto its surface. It’ll sizzle when the pan is ready.
Step 3: Let the egg sit for a minute or two before you start moving it.
And then…
No sticking whatsoever! For scrambled eggs, follow the same measures.
Preheat, then let the eggs sit for a moment before scrambling.
Is the food still sticking? Here’s why:
- You didn’t fully preheat the pan before adding food. If the pan is too cold, food sticks.
- You’re going too hot and the food burnt to the pan.
- You’re flipping/ moving the food too soon. With proteins especially, let the food cook enough before moving it.
- You might need to add a dash of oil for extra sticky foods or on older pans (preheat the pan before adding oil).
- There’s built-up oil residue on the pan, which happens from non-stick aerosol sprays (due to the extra chemicals). To rid the residue, clean your pan with a baking soda/ water mixture.
Drawbacks of ceramic pans
On average, ceramic coatings begin losing their non-stick abilities sooner than Teflon. But, you can extend their lifespan by following the Best Practices coming up.
Also, ceramic pans aren’t great for deglazing sauces as the surface doesn’t allow sticking.
And the aluminum bases do not hold heat well enough to sear like cast iron, either.
Important considerations of choosing a non-stick ceramic pan:
- Construction: Thick, higher-quality ceramic pans heat more evenly, which helps prevent sticking.
- Stovetop compatibility: Ceramic pans need stainless steel or iron layers for induction compatibility. GreenPan’s Valencia Pro, for example, uses an iron/ copper bottom disk. Caraway is another induction-compatible line.
- Coating: Not all ceramic coatings are created equal. For example, Blue Diamond has a diamond-infused ceramic coating, which increases durability. Hunt for a diamond or titanium-infused coating.
5 best practices to boost non-stick lifespans:
- Use low/ medium heat only. Too much heat weakens the coating.
- Avoid those non-stick aerosol sprays. Instead, add a dash of natural, high smoke point oil such as canola or vegetable.
- Let the pan cool before cleaning to prevent shock damage.
- Don’t use the dishwasher. Work a soft sponge with hot, soapy water instead.
- Avoid metal utensils – choose wood or silicone utensils instead.
Takeaway for ceramic
Altogether, non-stick ceramic is the closest alternative to non-stick pans you can get.
While not as long-lasting as PTFE, they offer the same type of non-stick ease… But without the health concerns.
So when you need a pan that’s easy to cook with and clean, ceramic makes the best alternative to Teflon cookware.
Plus, they’re affordable and available in many set options—
Recommended products: Consider GreenPans Valencia Pro for a higher-end, longer-lasting pan. Caraway and the Always Pan are two other great picks.
Or, check out the Blue Diamond non-Teflon pan for a budget-friendly option.
#2 Cast Iron
Cast iron is all-natural (no artificial coatings), budget-friendly, versatile, and can last forever. Plus, when seasoned properly, it’s almost as non-stick as Teflon.
Benefits of Cast Iron Pans
Unlike standard non-stick pans, cast iron develops a natural, non-stick layer that improves over time.
With a bit of patience and a dab of vegetable oil, you gain a slick Teflon alternative. While not as non-stick as Teflon and ceramic, it comes close.
Also, thanks to cast iron’s ruggedness, it’s a one-time purchase… With proper maintenance, you’ll never need to replace it!
It’s affordable, too. A $30 pan will outlast an entire set of Teflon and ceramic.
And last, cast iron has excellent heat retention and stovetop compatibility. Once it gets hot, it stays hot, browning and searing food easily.
You can use it on any stovetop, too.
Enough chatter, here’s how to use cast iron as a non-stick pan alternative—
How to prevent sticking with cast iron – First things first…
Before anything, always season your pan.
This is your permanent base layer and helps prevent most foods from sticking. Yet, for super sticky stuff, the following section is critical.
Step 1: Wash your pan with dish soap and hot water (the only time you’ll use soap), then dry it thoroughly.
Step 2: Place foil on your oven’s bottom rack to catch any oil drippings. Set the oven to 450-500℉.
Step 3: Wipe your pan inside and out with a layer of vegetable oil. Cover every nook and cranny.
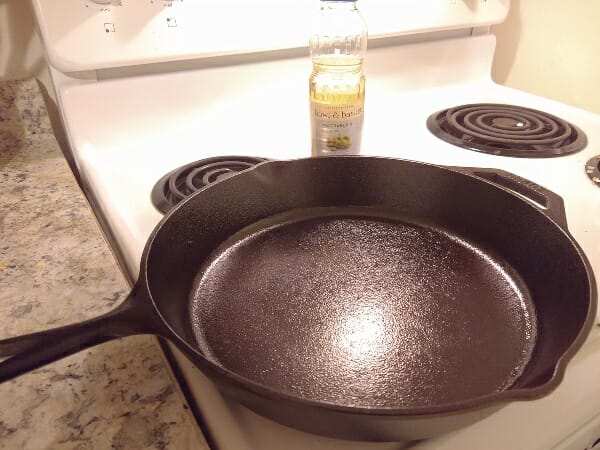
Step 4: Then, grab a fresh towel and wipe the pan again, stripping any excess oil. You want a super-thin layer leftover. Too much oil will cause stickiness.
Step 5: Place the pan upside down on your preheated oven’s top rack (the foil catches any dripping). Bake for 1 hour.
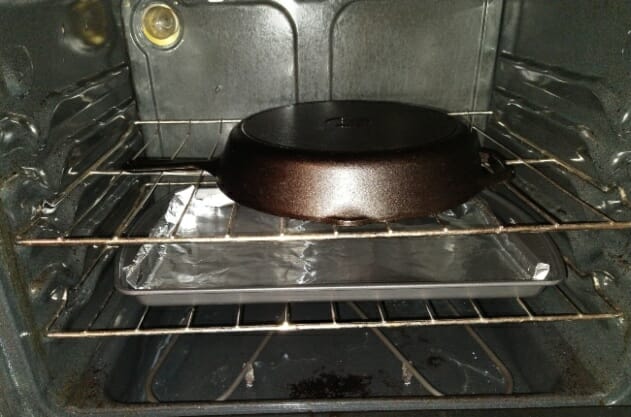
Step 6: Once the time is up, let the stove and pan cool before removing from the oven.
Voila. Now you have a slick, properly seasoned cast iron pan. And the best part? The seasoning maintains itself from the fats in your food!
The Test: Cooking extra-delicate foods with cast iron
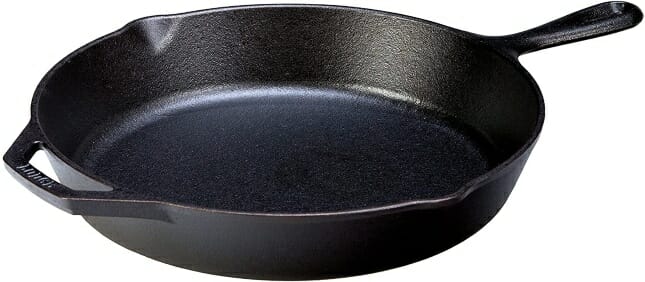
I’m using a new 12” Lodge cast iron skillet that I scored a few weeks ago and ran through the above seasoning process twice.
Step 1: Preheat the empty pan over medium-low for 7-8 minutes. I use the #4 setting out of 9 on my *electric stove (*gas stoves heat faster – you may not need 7-8 minutes).
Since cast iron disperses heat slowly, you must ensure the entire pan is hot. To check, use the water drop test: Drip some water on both the pan’s center and towards the edge. The water should ball up in both places (looks like Mercury), as shown in this video.
Step 2: Once the pan is hot enough, add 1-2 tbsp of fat (butter, ghee, oil, etc.). For butter, wait until it’s fully melted and spread it around the pan.
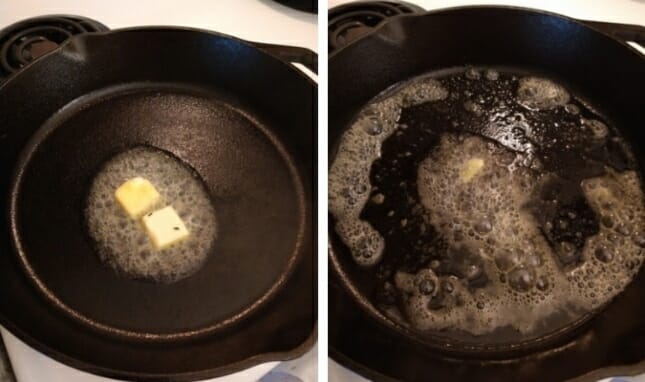
Step 3: As soon as the butter fully melts (above right), drop your eggs in. Let them sit for a minute or two – wait until the whites stiffen and bubble. You’ll see them almost rise up from the pan’s surface.
See below:
Ignore the one egg with a broken yoke – that was purely my error!
Step 4: Once the egg whites firm up a bit (shown above), now you’re ready to flip.
See, no sticking whatsoever!
For scrambled eggs, follow the same concept. Preheat, oil, then pour in your whipped eggs. Then, let the edges start lifting from the skillet’s surface before you begin scrambling.
Is the food still sticking? Here’s why:
- Too little butter or oil.
- The pan is too cold when you add the fats.
- The oil burned. If you add the fats too early, they can burn and gain a gummy texture that causes sticking. So, add the fats (to a hot pan), wait a few seconds, then add the food.
- You went too hot. Low and slow cooking works better for delicate foods in cast iron.
- The food is too cold. Let ingredients sit outside the fridge for a little before cooking.
- The meat or fish is too wet. Always pat dry proteins before tossing them into the pan.
Drawbacks of cast iron
Cast iron is higher-maintenance than Teflon and non-stick ceramic—
For one, you can’t use dish soap or the dishwasher. Detergents strip the seasoning, so you’ll need to hand-wash. Also, hand-dry right after to prevent rust.
You’ll still need to re-season your pan every few months, too. Plus, cast iron needs a fair bit of oil to prevent sticking, so it’s less calorie-friendly than ceramic and Teflon.
If you don’t want to worry about seasoning, choose enameled cast iron.
Another point is the food limitations… You shouldn’t cook acidic foods in cast iron (for example, tomato-based dishes). The acid strips the seasoning.
Lastly, cast iron is dense and heavy, so it takes a while to heat up. For a faster heating alternative, go with carbon steel pans.
Considerations of choosing your cast iron pan:
- The pan’s surface: Like Lodge above, modern cast iron pans often have a slight texture. Yet, others like Finex boast a polished surface that further prevents sticking.
- Do you want easier care? Enameled cast iron pans don’t rust or need seasoning and take soap just fine. But they’re more expensive and less non-stick than seasoned iron.
- Weight: Don’t go straight for a giant pan. Cast iron is heavy, so only buy the size you need. Check out carbon steel for a pan that shares cast iron’s non-stick benefits yet weighs less.
4 best practices to care for cast iron pans:
- Don’t cook acidic foods in cast iron. Enameled versions handle acidic food, though.
- To clean, scrub with a stiff brush and hot water. Then, wipe dry to prevent rust.
- For extra stuck-on food, boil water in the skillet on high heat. Then, work a metal spatula to scrape out the gunk. Coarse salt with a scrubber works too.
- After you wash and dry your pan, wipe a thin layer of vegetable oil into the iron to preserve the seasoning.
Takeaway for cast iron
Cast iron takes extra effort to prevent sticking, compared to ceramic. But it’s a fairly quick and straightforward process.
The two keys – Proper preheating and plenty of fats, applied in the correct order.
With this simple process, you’ll gain a healthy alternative to non-stick cookware for life. Not just healthy, but iron’s versatility and heat retention produce unrivaled results.
Yet, cast iron isn’t for everyone. If speed and convenience are most important to you, consider ceramic above.
Recommended products: Our top (affordable) cast iron pick is this Lodge skillet.
For even higher non-stick performance, go with Finex’s polished skillet. It’s pricey, but the smoother surface resists sticking better.
#3 Stainless Steel
Countless households and chefs worldwide swear by stainless steel for its versatility.
With a few simple tricks, you can use it as an alternative to non-stick pans, too.
Benefits of Stainless Steel Pans
Steel is like a hybrid between the past two—
There’s no coating to wear out or chip – unlike standard non-stick pans. Yet, stainless weighs less than cast iron… And you don’t need to worry about seasoning layers.
Stainless steel doesn’t rust, so you can even chuck it in the dishwasher to save time when you’re busy. There are no worries about compatibility, either, as it works on all stovetops and ovens.
And, like ceramic pans, steel comes in a wide variety of shapes, sizes, and *performance levels. (*More on that soon).
So, let’s dive deeper into this handy non-stick alternative.
The Test: How to prevent sticking with stainless steel
Below, I’m using an old 8” tri-ply Kenmore skillet with copper bonding. I believe these were discontinued, but this pan from Anolon is similar.
For step-by-step instructions, follow the same process as cast iron (see above) – the only difference is heating.
Stainless steel heats up faster, so don’t preheat as long. Again, test the pan’s temperature with water droplets.
So let’s see how it goes for me.
Step 1: I preheated the empty pan over medium-low (#4 out of 9).
Step 2: Then, I dropped some butter in and let it melt (Although I think I used too much butter!).
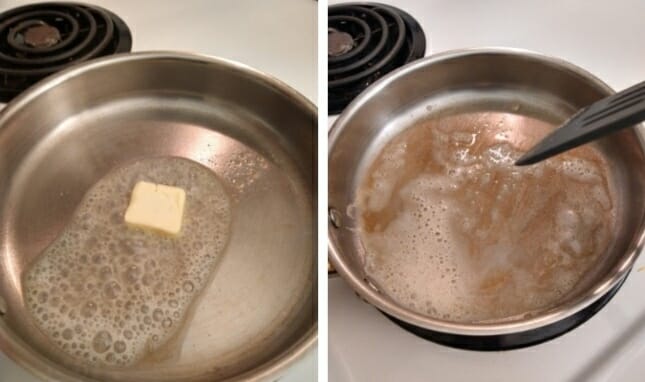
Step 3: Once the butter melted, I dropped the egg in and let the whites stiffen.
See, you can make eggs without worry, even in a non “non-stick” pan!
Step 4: Once the egg whites stiffened up and bubbled (seen above in the video clip), I flipped the egg and finished it off.
Again, scrambled eggs (or other delicate foods) follow the same concept.
Heat the pan to the right temperature and add enough fats.
Is the food still sticking? Here’s why:
The troubleshooting for stainless steel is the same as cast iron – see above.
If you still can’t prevent sticking, add a temporary seasoning layer. Here’s how:
- Preheat an empty steel pan over medium-high heat for a few minutes.
- Then, add a canola or vegetable oil dash – wipe it around the surface with a towel (carefully).
- Then, let the pan sit until the oil begins to smoke. After it does, remove the pan from heat.
- Once the pan cools, wipe out the remaining oil. Done!
To be clear, you don’t need to season stainless steel. Plus, it’s not as permanent as cast iron seasoning.
But, it’s an easy process you can do right before cooking.
Drawbacks of stainless steel
Like cast iron, stainless steel requires more effort to use as a non-stick alternative. But for a different reason…
While there’s no seasoning upkeep to worry about, the absence of this slick layer makes the pan harder to clean. Food tends to stick more than on seasoned cast iron.
And steel by itself doesn’t heat evenly, which increases burning and sticking. One way around this is to use multi-clad pans – see below.
Lastly, high-quality stainless steel is relatively expensive compared to the other cookware types.
Considerations to choose the proper steel pan for non-stick cooking:
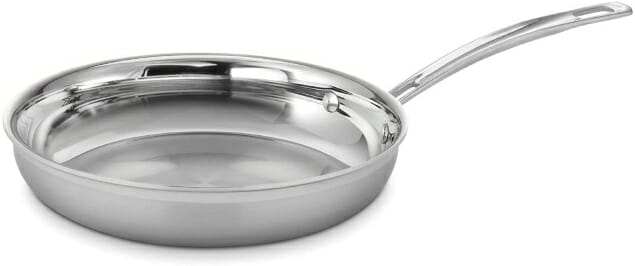
- Construction: Proper construction is crucial for using steel as a non-stick alternative… Grab a high-quality multi-clad pan with an aluminum or copper core sandwiched by stainless steel layers. This design prevents cold spots, heats evenly, and prevents warping.
- Stainless steel grade: Avoid cheap 200-series stainless steel. It corrodes and sticks easier. Ensure your pan is 300-series (304-grade, 18/8, 18/10, 310-grade, etc.).
Best practices to care for stainless steel:
- Let the pan cool before washing to prevent warping.
- To avoid water spots, hand wash your pan with hot, soapy water – then hand-dry before storing. If you use the dishwasher, remove the pan once the cycle completes and hand-dry.
- For burnt-on food, let a water/ vinegar mixture soak for 1-2 hours, then scrub with a Scotch Brite scrubbing pad. You can also boil 2-3 sliced lemons for 10 minutes, then wash the pan after.
- Scrub the pan with Bar Keepers Friend or baking soda for burnt-on oil or stains.
Takeaway for stainless steel
Overall, stainless steel is a healthy, long-lasting, and versatile pick.
There’s no coating or seasoning layer to worry about, and with a few simple steps, you can prevent sticking.
It’s lower-maintenance than cast iron, yet still compatible with any stovetop.
But, of course, it’s not as easy to use as Teflon or ceramic.
Side note: Any old steel pan won’t do—
You need a quality multi-clad skillet for non-stick cooking. Non-clad stainless steel heats unevenly, which increases sticking, as mentioned.
Recommended products: Check out Tramontina’s Tri-ply pan for a quality, affordable multi-clad option.
Or, for the best non-stick performance, check out All-Clad’s D3 tri-ply pan. Either one can last you a lifetime.
Recap & Recommendation | Which should you Pick?
So far, we’ve discussed the three best alternatives to traditional non-stick… Now you’re left with making a decision.
To help you do so, let’s recap each non-stick alternative, touching on their main benefits and drawbacks—
Ceramic-Coated Non-Stick Pans
Ceramic-coated pans are the closest thing to standard non-stick.
Like Teflon, they wipe clean easily and resist sticking without oil. Yet, unlike Teflon, there are no toxic fumes if you overheat!
You don’t need to worry about seasoning your pan, either, so it’s lower maintenance than cast iron.
But ceramic pans only last a few years tops… They’re a bit less rugged than Teflon. Ceramic also doesn’t sear as well as cast iron and stainless.
Cast Iron Pans
Unlike any other cookware (besides carbon steel), raw cast iron develops a natural non-stick surface that improves over time.
With some maintenance, you’ll enjoy non-stick cooking like Teflon – without the toxins.
Also, cast iron is remarkably versatile… It’s oven-safe and compatible with all stovetops at any temperature.
Plus, cast iron is unmatched in searing and browning, thanks to its heat retention.
But, it does require more effort than Teflon and ceramic. It’s heavy, heats slowly, and reacts with acidic foods.
You must always hand-wash and dry to prevent rust.
Stainless Steel Pans
Stainless steel is a bit of a hybrid—
Unlike cast iron, it’s non-reactive and rust-proof like ceramic pans – so you can use soap, the dishwasher, and cook acidic foods. Steel requires little maintenance (no seasoning) and isn’t too heavy, either.
Yet, like cast iron, it’s compatible with any oven/ stovetop, and it’ll sear and brown food well.
But, the primary drawback of steel is the lack of a seasoning layer.
Food sticks more easily to steel than seasoned cast iron. So, it requires more effort to prevent sticking (i.e., preheating and oiling steps), plus it’s harder to clean.
My Recommendation
If you value ease and convenience more than durability, go with ceramic. It’s the closest alternative to Teflon pans you can get…
Pick cast iron for something more durable and versatile, yet similar to Teflon’s non-stick surface. Once well-seasoned, it’ll perform almost as well. (For a lighter-weight alternative, consider carbon steel).
And for something in the middle of the two, pick stainless steel. It’s easier to manage than cast iron, yet more versatile than ceramic.
I recommend a mixture of two or three. For example, grab a non-stick ceramic pan and use it only for busy days or super delicate foods.
Then, grab cast iron or stainless steel for everything else!
Conclusion
That’s a wrap on exploring the best alternatives to Teflon frying pans!
We covered why to ditch Teflon in the first place (health reasons). Then, we explored the three alternatives – covering their pros, cons, how to use them, best practices, and more. Finally, you saw our top picks for each.
Now it’s your turn… Which will you try first?
P.S. Check out our review of the ten best non-toxic cookware sets and nine best non-stick pans without Teflon to dive deeper on this subject.

Hi there! I'm Adam, author and founder of TGL. Since 2016, I've produced and sold non-toxic kitchenware throughout the US. Today, I'm using my passion and experience in sustainable product manufacturing to help families avoid unsafe reusable foodware. When I'm not writing, you'll find me hiking or camping throughout Appalachia!
Enjoyed this post? Share it with your friends!
Related Posts
FREE Guide
Non-Toxic Kitchenware Checklist
Get a step-by-step product guide with insider tips & tricks for the safest kitchen possible!

