There are so many creative ways to recycle plastic bottles. The possibilities are endless, with loads of DIY projects on the web, such as these self-watering planters.
Upcycling plastic bottles is a great way to help the environment and spend quality time with your family! It’s also the most eco-friendly method for dealing with waste. Why?
Over 60 million plastic bottles end up in landfills and incinerators daily – about 22 billion last year. While recycling plastic is highly recommended, it’s not necessarily eco-friendly. For example, only about 5% to 6% of plastics are actually recycled each year in the United States.
Although recycling plastic bottles takes less energy than making them from raw petroleum, it still requires energy production, and with that comes pollution.
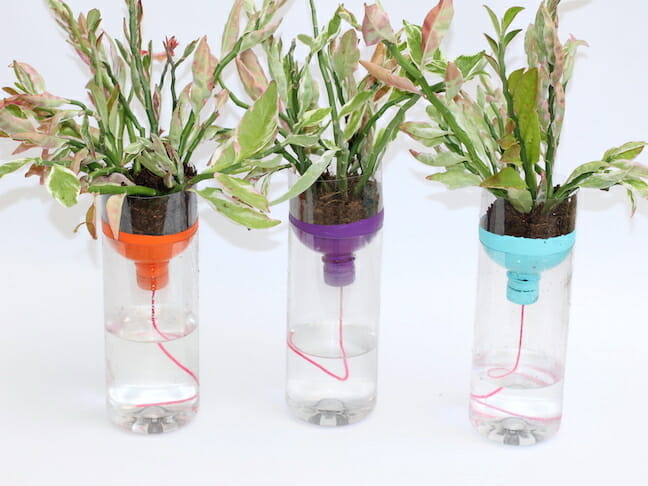
With this fact, any plastic bottles we can reuse for other purposes are the best option. Turning bottles into self-watering planters is one great option, and we’ll show you how below. These planters work for almost any indoor plant, even vegetables such as tomatoes or herbs!
Reusing can be pretty fun!
How to Make a Self-Watering Planter
Starting, you’ll need a few essential items on hand:
- Plastic water bottles
- Scissors
- Acrylic paint
- Paintbrush
- Yarn
- Hammer/ nail or a drill (for punching a hole through the bottle cap)
- Soil and plants/ seeds
- Water
- Needle
- Painter’s tape
Step 1
Remove labels from the bottle and wash/ dry. Then, carefully cut your bottle about 5″ up from the base using scissors.

Step 2 (Optional)
For decoration purposes, wrap a piece of painter’s tape around the top part of the bottle and paint a solid color. Let dry.

Step 3
Using a hammer and nail (or drill), carefully punch a hole through the center of the bottle cap. This hole is a critical component of the watering system.

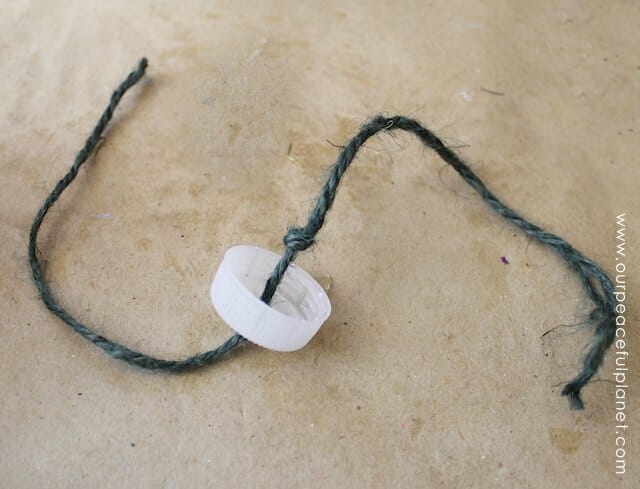
Step 4
Cut a piece of yarn about 10″ long and feed it through the drill hole in the cap. (You can pull the yarn through the cap with a needle if this is difficult.) Make a knot inside to keep the yarn in place (as shown).
- The purpose of the yarn is to suck water up from the reservoir at the bottom of the planter.
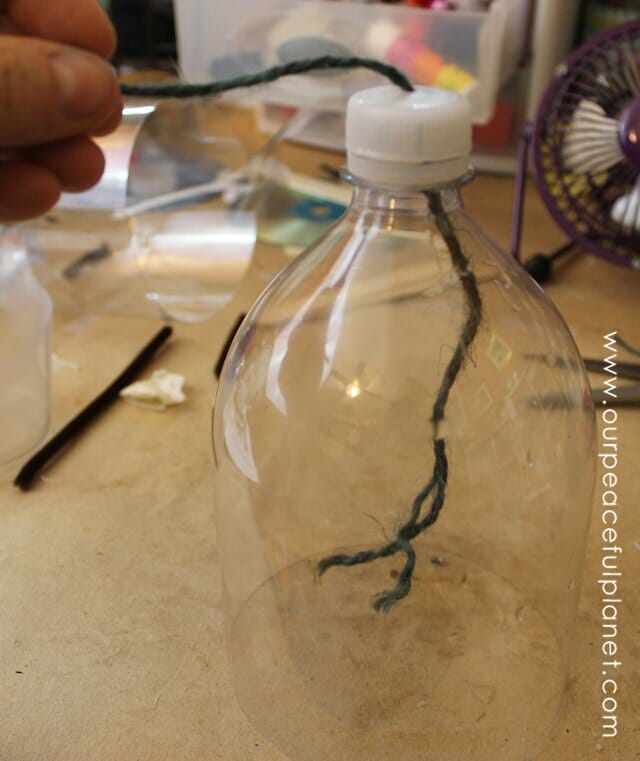
Step 5
Attach the cap to the top half of the bottle.
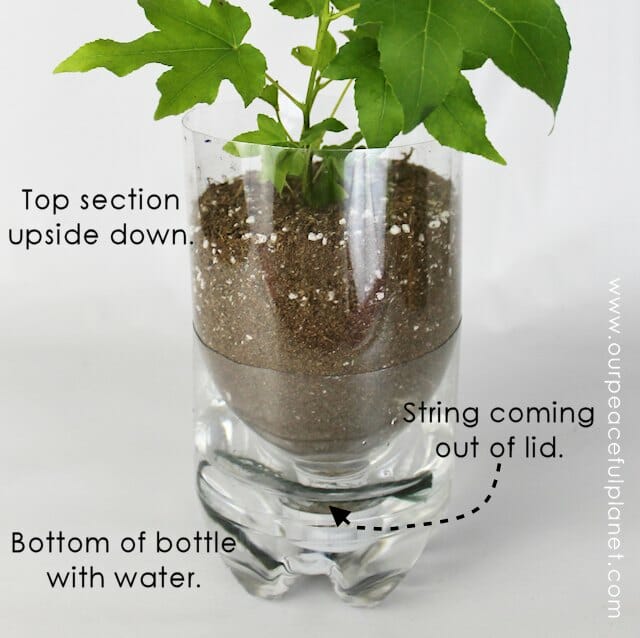
Step 6
Fill the bottom of the planter with water, and then place the top portion upside down into it.
Add some potting mix and seeds (or cuttings) to the upside-down section.
IMPORTANT: Water the plant yourself first, as the potting soil must start damp. After that, it should pull water up the string into the soil on its own.
Make sure the bottle does not dry out. When it’s getting a little low, carefully lift the top portion and refill the bottom.
You want the piece of yarn always to have water available.
Credits:
- handmadebykelly and craftyourhappiness for the awesome project ideas!
Additional sources: